Showing posts with label projects. Show all posts

Saturday, August 11, 2012

Blueberry & Syrup Muffins + A Few Projects

Yesterday, the tiny humans demanded blueberry cupcakes. While I don't cater to their every whim, sometimes I don't mind making them a little treat. This past week I also finally painted this little shelf we wanted to use to display our "family", which consists of mostly wind-up toys we collect from our adventuring. And I even busted out (turned on) the sewing machine for my first sewing project! 

We are going on vacation this next week (P.S. : I'm taking a week hiatus!) and I haven't been buying that much food stuff so it doesn't just sit & go bad while we are away. So basically I didn't have much to work with to make these blueberry cupcakes. Also, I didn't want to make cupcakes, I wanted to make more of a muffin.
First, I was out of eggs, but had some egg replacer left over from trying to cook egg-free for Matts brother. Second, I only had white flour (left over from making play-doh), which I always try to sub out for whole wheat, so I was stuck with that precessed white stuff. Third, I had a 1/2 cup of apple sauce left in a jar in the fridge that I wanted to incorporate & I didn't want to use too much sugar, so I tried adding just the applesauce and syrup. While that gave them a yummy taste, it made them really moist and I still ended up adding a little sugar.

Blueberry & syrup muffin ingredients:
1/2 cup applesauce
1/4 cup syrup
1 tbsp vanilla
1 tsp baking soda
1 cup flour
2 tbsp sugar
2 egg whites, or egg replacer
1/2 cup blueberries

Directions: Mix all ingredients, pour into greased pan, bake in 350 degree oven for 15-20 mins.

Pictorial process:


Here is the little shelf I finally painted. Before, our "family" of wind up toys was hidden, sitting on our book shelf. Now they are on full display. I ALWAYS try to use what we have on hand for projects, even if it means slight improvisation (see: blueberry muffins). I had this almost full can of spray paint left over from a previous project that we will prob. never use again, so I used it to paint the wooden shelf. Well, it says 'special purpose', 'for metals'. Pssh, whatever, I used it on the wood and it worked just fine!


This was my first sewing project with my new (hand-me-down-from-my-mother-in-law) sewing machine. I made a flag banner-- at least I'm pretty sure that's what it's called. It is pretty messy, but it was a good project for fiddling around with the new machine and making something easy & whimsy.
Now we're off to Leavenworth, Washington for another family adventure! Hope you all have a good weekend & week!

Friday, August 10, 2012

DIY Glitter Shoes

So maybe I just ordered these shoes from Forever 21:


There's actually no maybe, they are bought, paid for and on their way to my house. BUT, I've been wanting to MAKE glitter shoes myself for the past few months, and can never really get enough of glitter anything, so I finally made some time to do so. I also just happened to have all the essentials to make the shoes. These glitter flats were very easy to make & were an excellent way to repurpose some old sad shoes!

You'll need:
-glitter (I used a combo of fine silver & larger gold glitter)
-mod podge
-paint brush or paint sponge
-bowl
-shoes
-spray adhesive **I did use this to finish the shoes after the final coat had dried, but would recommend using a different finishing spray adhesive or clear coat.

Directions:
-mix mod podge and glitter in bowl (I did about half/ half)
-paint mixture on shoes, let dry
-paint however many more layers to completely cover shoes in glitter (I did 3)
-let dry completely
-spray on spray adhesive to finish and seal

Sad shoes in need of glitter love:
** Sad shoes are so much sadder when you give them creeper eyes. Fact.


Happy, sparkly shoes:


I'll incorporate these shoes in my next outfit post :)

Friday, July 27, 2012

Eco-Friendly Fridays: 3 Things As Seen on Our Front & Back Porches

For the majority of my life, I've been passionate about sustainability. I first wrote: 'since college' instead of 'for the majority of my life', but my environmental mentality began at an earlier age (probably in a little garden my mom always kept when I was growing up) and was really honed in college. 

Currently, I've been focused on small-scale sustainability. Let's be honest, it's not easy to be a die hard environmentalist, ELF member, living-off the land kinda person. I could totally do it, but probably only if someone forced me to and/or there was an alien attack which annihilated the majority of our species. Side note: Matt's pretty obsessed with the OBVIOUSLY impending zombie/alien apocalypse, so we talk about this stuff a lot hah!

BUT, it's not hard to make simple, every day choices that encourage environmental stewardship. There are many small things one can do to become more sustainable. Sustainability, in every aspect of life, is crucial in my opinion for the longevity and future of our earth and the people on it. I could go all hardcore and write an essay about our obligation to environmental stewardship (even in biblical terms, people), but most of us understand or have some inkling of how much stuff we consume and how we consume/dispose of said stuff and that everlasting effect on our planet. 

Basically, I want to show some simple things (which I'll do every friday) that I do/ my family does to reduce our ecological footprint and that encourages us to take a closer look at not only how we live, but what we consume and how we consume it (both in our bodies, aka food, and otherwise). Here are three examples that just happen to all be on our front and back porches.


#1: Reuse/ Repurpose:

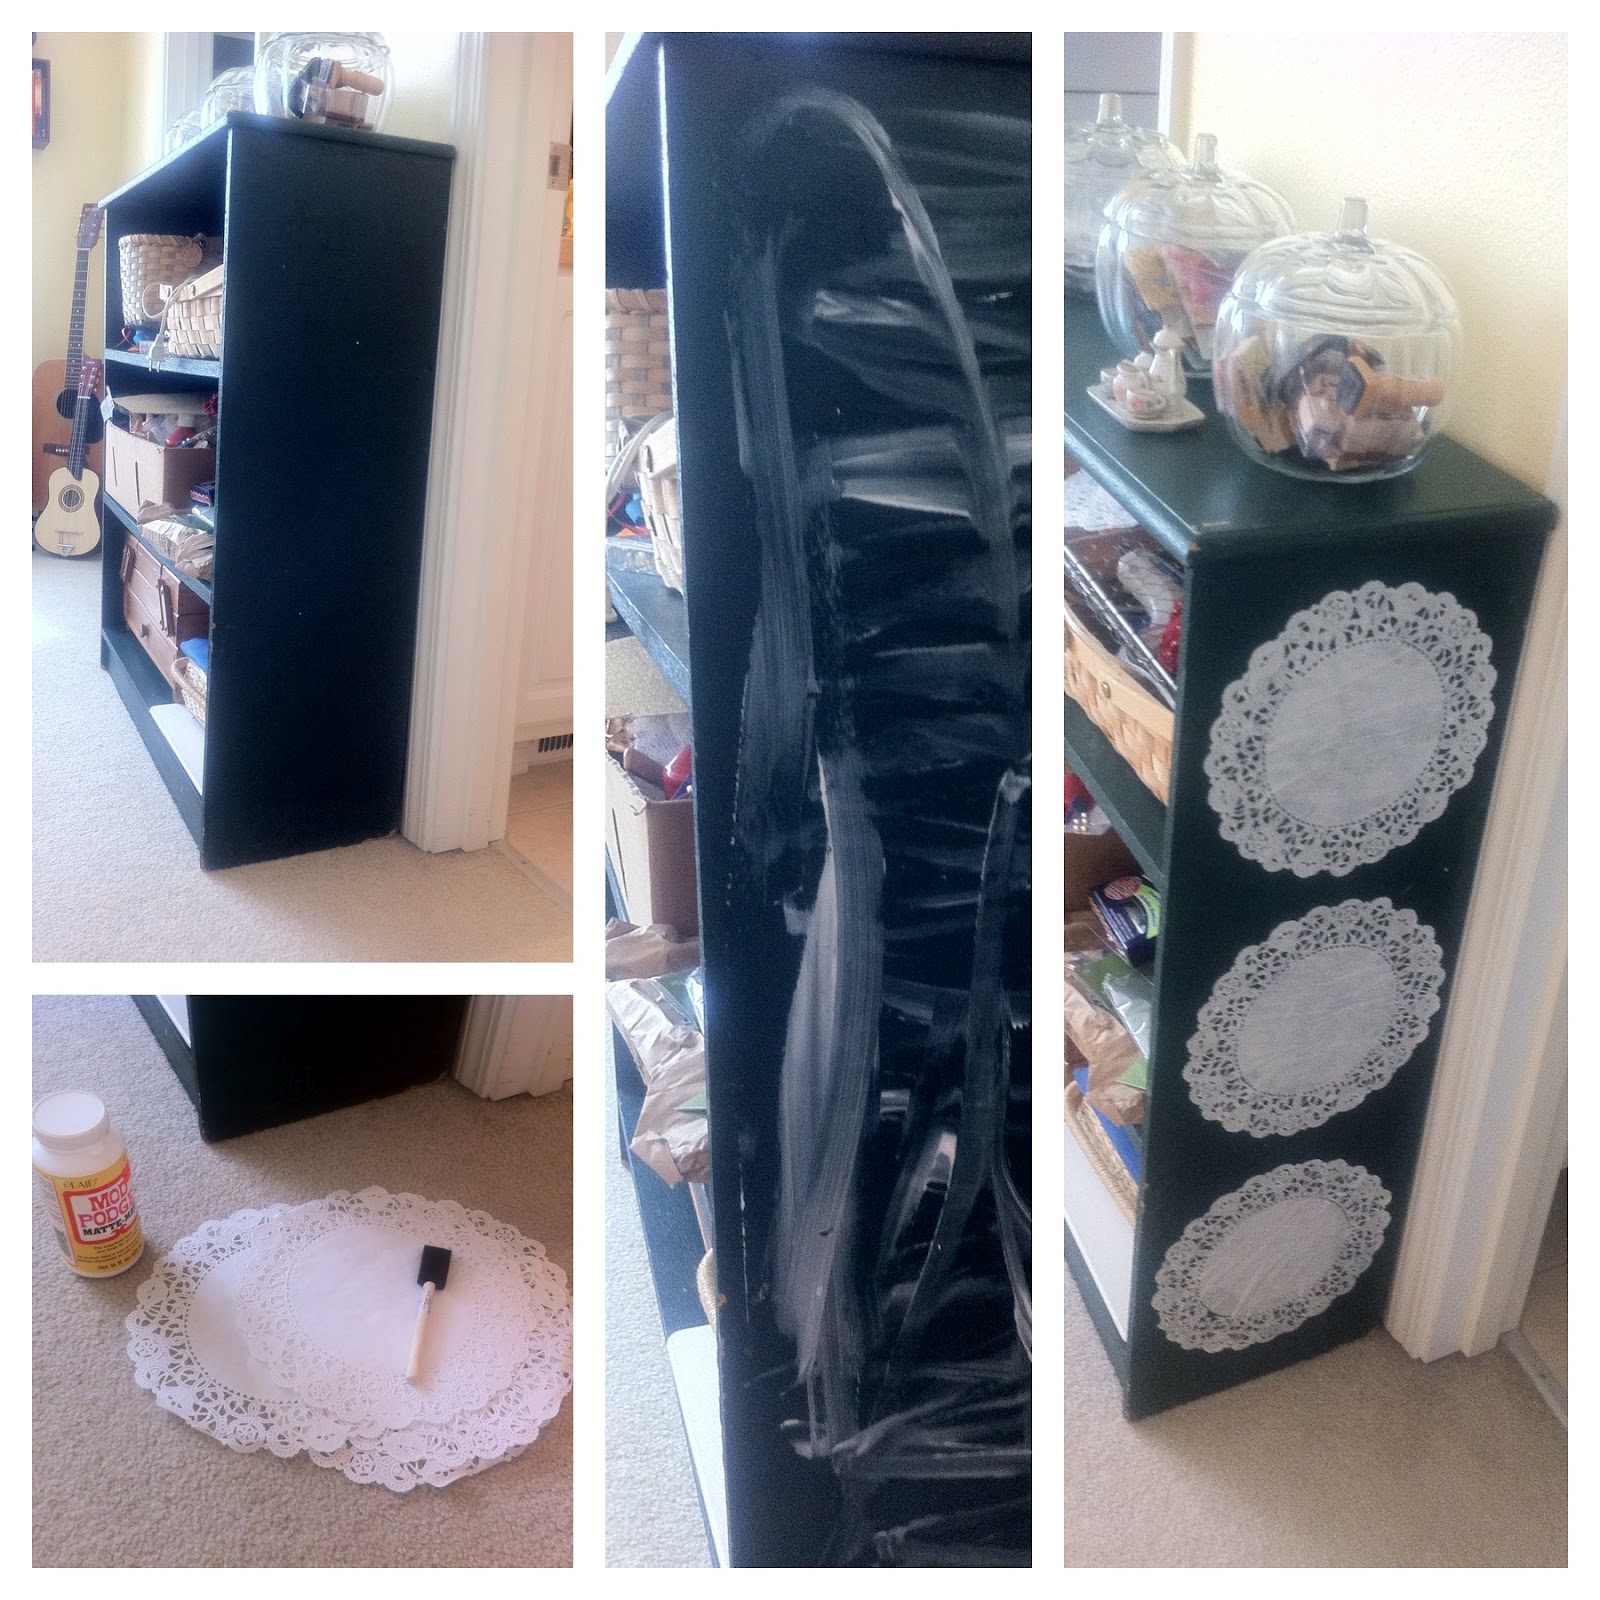
Keep your crap. You never know when/ how you may use it again. Okay, so DON'T became a hoarder-- know when to pass off or give away things that you aren't using, but do so with the long term in mind. I'm a believer that surrounding yourself with less stuff can lead to a greater life, but sometimes reusing or repurposing old stuff that you have held on to is really fun. That, and you just can't beat that basically free price tag. 

We had this old wicker chair and table from my childhood that we, on many occasions, wanted to donate to goodwill, but kept putting it off. This summer we decided to spruce up our front and back porches and realized we needed to buy some new stuff to do so. But, per usual, we were poor and HATE buying something new that won't actually get used that often. We thought about cragislisting it, but then remembered the old wicker furniture living in what used to be our man cave and realized a quick coat of paint could mean a new life for them at no big cost to us. 

This was the best 'before' pic I could find: the wicker table all decked out in halloween loveliness....


Before:


After + chair (forgive the mess.. we still have a few things to plant):


We also cleaned out Matts moms storage room and discovered a bunch of stuff that could have a new life at our home, such as these chairs, cushions and lighthouse bird feeder. The pillows, table and umbrella are actually used too-- they were priorly used as staging furniture for my moms company.


#2 Sub-Urban Gardening:

Welp, 3 years ago we made a decision to buy a town-home and it was for sure the wrong decision. As first time home owners, college go-ers, and having a relatively new baby, we thought a townhouse was a great choice; low yard maintenance, young families, small community, etc.  And it was, for like a year, until our baby got big and demanded space to roam, we realized we had so many neighbors it was like apartment living all over again, I finished school and our desire for a little piece of land to call our own grew. 

We decided to move. Then the housing market crashed. Shit. So, when life gives you moldy lemons... you plant a garden in planter boxes. That's how the saying goes, right?

Urban Gardening is the process of growing plants of all types and varieties in an urban environment. It is a great way to learn about the food growing process (for adults and tiny humans) when you don't have any land and/or have very little space to actually grow plants. It can make you a little less dependent on large scale farming/ shipping food long distances thus wasting a great amount of natural resource. Also, just planting a basic garden, without edibles, is a good way to get back in touch with nature, feed bees & birds & other little insects, and encourage ecological/biological diversity in your neighborhood. We happen to live in a suburb of Portland, so I thought sub-urban garden was a more proper term.

Our urban gardens:

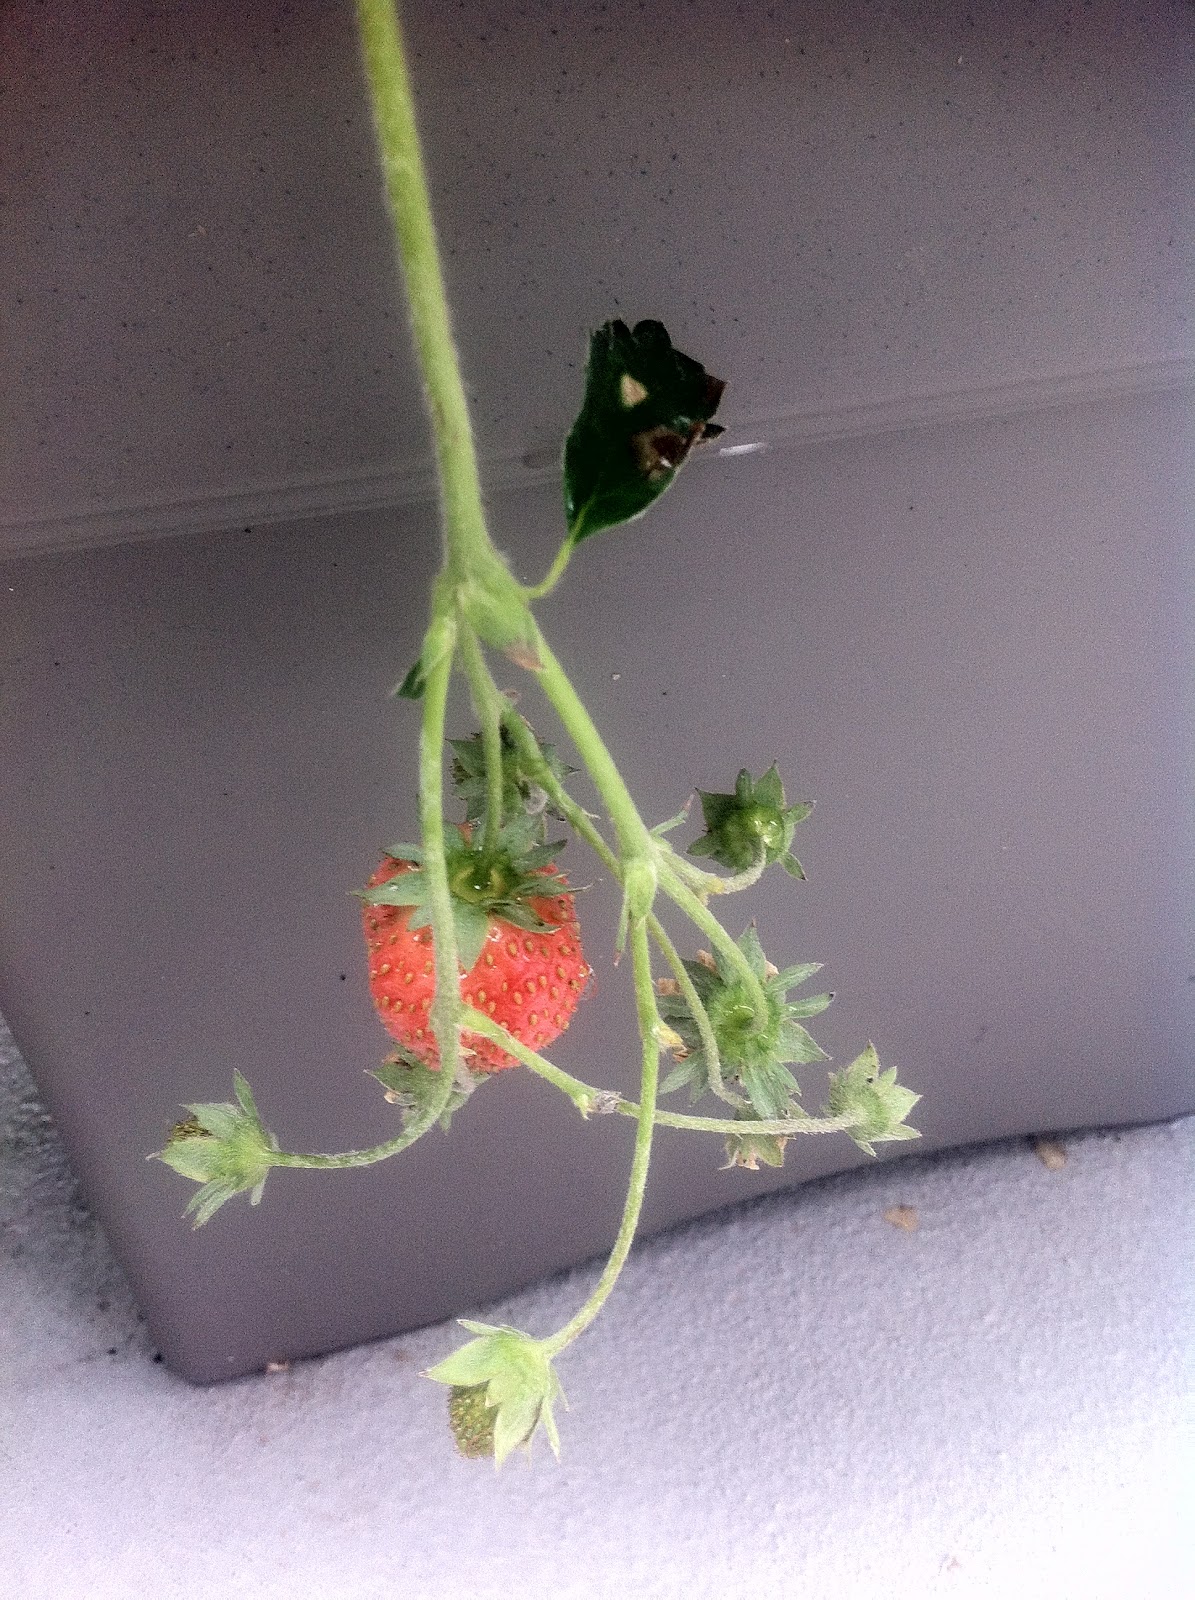
Edibles: chives, carrots, blueberries, strawberries, tomatoes, bell peppers, and edamame:


Before Olin ate all the blueberries:


Flowers/ other plants:


#3 Buy Locally:

Our windmill bird feeder is just one example of something bought and made locally. It was bought at the Astoria Sunday Market. It was handmade by a guy whose daughter Matt actually grew up and went to school with. Buying locally obviously stimulates local economic growth and encourages all the benefits that come with the promotion of a small businesses aka: local jobs. Buying locally reduces overall shipping costs such as the cost in fuel, ENERGY and time as well as the basic monetary cost. When an item is made and bought locally, great amounts of oil, of which resulting emissions can greatly impact our environment, aren't wasted on simply transporting that item (like from China to the U.S.). While Matt and I don't actually live in Astoria, Matts mom does, and we hope to also one day.

Also, the little table the bird feeder is sitting on was bought from a thrift store for under $5 and repurposed by us.


Tuesday, July 17, 2012

Simple DIY shabby-doily-chic shelf

So we have this shelf. It was a free, sturdy, FREE, functioning shelf. Digression: we have definitely jumped on the bandwagon of buying furniture/ clothing/ nicknacks used or thrifted as often as we can. Trips to Target are a big no-no in this household now and hopefully (fingers-crossed) a thing of the past. Not only do we ascribe to the "sustainable" lifestyle that comes with buying used, but there is just a wonderful sense of satisfaction you get when you buy a lovely piece of history for really cheap (or in this case obtain it fo' free).


Anyways, I just happen to be in the midst of converting this little nook we have in our master bedroom into a craft/ sewing area and this little shelf was the prefect size to fit all my crafting junk and not so cumbersome that it took up too much space. It is a nice 90's dark forest green color, which normally I would happily paint over, but for some reason I liked this little shelf in its original state. I knew I wanted to do something to it and really emphasize its shabby chis quality. Well, I sifted through my crafting junk (I'm also a big fan of using what you have on-hand when it comes to crafts, food or decorating) and found some leftover doilies from this pumpkin painting party we had and decided they would be just the perfect addition.


The shelf: You see it right when you walk into our room and it was just a bit boring.


Use this stuff: 
 Mod Podge it:


Align your doilies:


Note: organize your craft junk before taking pics :)


Let the mod podge dry and there ya have it: a shabby-doily-chic shelf... oh, my!


Simple pic of it all:

I'm thinking of adding some little studs or even (gasp!) glitter? The possibilities are as endless.